


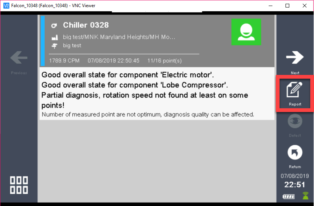
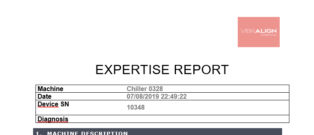
Once this report is exported to a “thumb drive” or to a PC it can be reviewed and edited to meet the end user’s needs. One of those needs may be adding a custom logo instead of the default logo. Adding your own logo may not always be needed, but it also may ensure a senior manager or potential customer may see it. The report below has our logo on it. This can be edited to whatever you want.
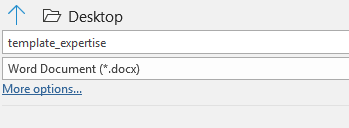
To add your own logo simply open the word document that is exported out of the SMC or Falcon. Once the document is open you can edit the header to include your logo or name. When you have completed this, press the “save as” button to ensure the document is saved as a .docx file and the name is “template_expertise”. The file must be saved as this file type and exactly this name or the SMC/Falcon will not recognize it.
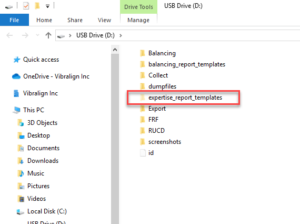
After the document is saved connect your SMC or Falcon to your PC via the provided USB cable. After connecting, open up the folder named “expertise_report_templates.” This is the location you want to paste your recently created template.
Now that the template is installed you can generate the reports normally and it will include your updated logo or name–it’s as simple as that.